This article ex”plains’ ho\”w to c\’onfigure a Mikrotik device straight out of the box. It goes through the Winbox configuratoin utility and some of the basic setup procedures to turn your MikroTik device into a home or office wireless and wired router. In this tutorial we will go through a step by step guide to make it as simple as possible to learn and implement these setting s on your own routers.
Completed
- Downloading and running winbox
- Winbox in more detail including configuration files
- Setting an identity on the router
- Setting an IP address on the router
- Setting a password
Coming soon…
- Setting up dhcp client
- Setting up a dhcp server on a bridge
- Setting up a nat (Network Address Translation)
- Securing services on the router
- Setting up the wireless Access Point
- Implementing a basic firewall for security
Downloading and running Winbox
Winbox is the graphical configuration utility for MikroTik RouterOS. It is a small application that can be downloaded from the MikroTik website at htttp://www.mikrotik.com Once you download winbox it can be run straight away, as no installation is required. It does however when running, setup a number of folders in your application data folder in order to save login data and plugins. This is transparent to the user but worthwhile to be aware, in order to diagnose problems and also understand the security implications of saving sensitive login information in the utility.
Winbox in more detail – including configuration files
Setting an identy on the router
1. Go to http://www.mikrotik.com/download.html and download the latest Winbox Configuration Tool under the Tools and Utilities section to you desktop.
2. Double click on the Winbox icon on your desktop.
![]()
3. Click on System menu item then on the Identy sub menu as in the image below.

4. The Identity dialog will open as in image below. Remove the default “Mikrotik” value and replace it with something meaning full. Usually the location of the router combiened with its purpose acts as a suitable Identity for your router.
To configure your router
Click IP >> Addresses on the left menu in winbox as in diagram below.

This will open the Address list dialog window as seen below. Click on the red plus button to open the add IP address window.
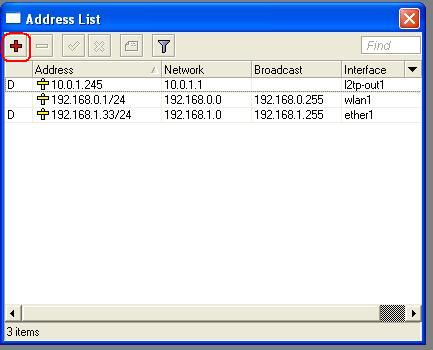
When the New IP address dialog opens enter the address details select an interface to set the adress on and press apply and OK button.
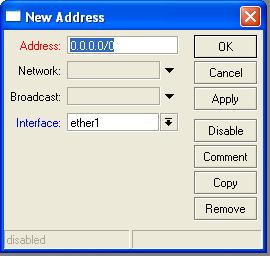
For information on what IP settings to use please see a basic tutorial in IP Networking. But just to explain one or two points about this dialog…
It is best to delete an address entirely instead of editing it, as I found that it a cleaner way of editing an address as to modify network or broadcast options can sometimes not apply 100% properly.
You have an option of entering the network and broadcast address explicitly in the boxes provided or is you prefer you can use the short slash notation and press the apply button, this will populate the broadcast and network boxes with the correct settings.
This tutorial demonistrates how to set the password of the current Mikrotik Winbox user.
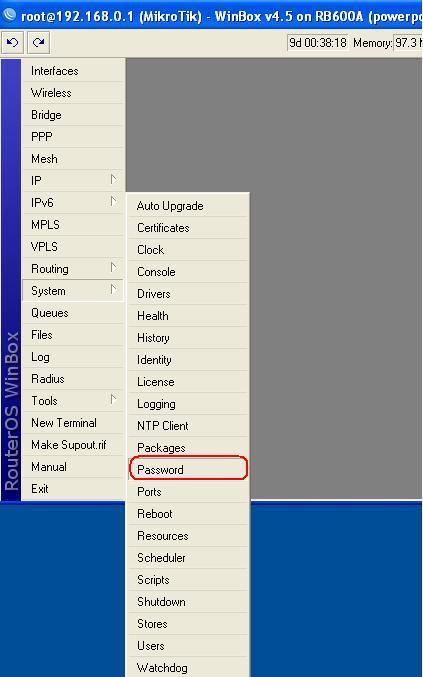
Click on the menu item as shown below
System >> Password
This will open the password dialog box as shown below.
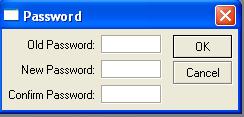
Enter the old or current password followed by the new password that you wish to use.
If this is your first time logging into the router or the router is on factory settings the Old password box should be just left blank. As the default username and password is admin and no password.
Note:
This is how you set the password of the current Winbox user. To change other users you must go to system >> users menu item open that dialog and set the password for that particular user. You must have adequate user privileges to perform this action.
